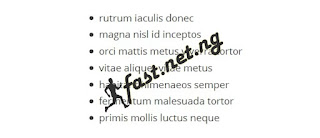
On This tutorial I will teach you how to create custom unordered bullet list by
using start image But many Blogger don't want to use Image. So the alternative way is using Font Awesome codes for displaying bullet pointer.
As We all know that Font Awesome is a set of pictographic icon so we can change icon according to our wish.
So for example purpose in this tutorial I have used hand direction. Installing widget is very easy just follow the below steps below
Step 1 Sign Into Your Blogger account goto
Blogger Dashboard
You can easily change Font Awesome icon by altering this code. "\ f0a4"
How to Add Bullet list?.
We have done all task and in this time we will add the bullet list in our Blog post. This is really easy. Just follow the below steps-
Step 1 Make your text in separate line like 2/3 lines.
Step 2 Now block the whole line by using mouse pointer.
Step 3 Finally click on Bullet list icon from formatting tools bar in writing panel.
Now publish your Blog post and check it, you will able to see bullet list powered by Font Awesome. The main positive side of using Font Awesome that this will load from maxcdn server which is very fast to load. And there hasn't any change to deletion of the icons, because we are not using any image.
using start image But many Blogger don't want to use Image. So the alternative way is using Font Awesome codes for displaying bullet pointer.
As We all know that Font Awesome is a set of pictographic icon so we can change icon according to our wish.
So for example purpose in this tutorial I have used hand direction. Installing widget is very easy just follow the below steps below
Step 1 Sign Into Your Blogger account goto
Blogger Dashboard
- Step 2 -> Template -> Edit HTML
- Step 3 Now find <head> By clicking Ctrl+F Type <head> In The Search box
- Step 4 Paste The Code in your <head>
<link href='//netdna.bootstrapcdn.com/font-awesome/4.3.0/css/font-awesome.min.css' rel='stylesheet'/>- Step 5 Now again find ]]></b:skin>
- Step 6 Paste the below code before]]></b:skin>
/*Bullet List by www.bloggerspice.com*/
.post ul {
list-style:none;
}
.post ul li:before{content:"\ f0a4";font-family: fontAwesome;
color: #333333;
font-style: normal;
top: 0;
left: 0;
margin-right: 13px;}
.post ul li{
position:relative;display:block;padding:5px 8px;margin-left:10px;background:#fff;font:15px "Oswald",sans-serif;color:#000000;text-decoration:none;transition:all .3s ease-out;
}
- Step 7 Now simply hit the SAVE template Button
You can easily change Font Awesome icon by altering this code. "\ f0a4"
Info message
How to Add Bullet list?.
We have done all task and in this time we will add the bullet list in our Blog post. This is really easy. Just follow the below steps-
Step 1 Make your text in separate line like 2/3 lines.
Step 2 Now block the whole line by using mouse pointer.
Step 3 Finally click on Bullet list icon from formatting tools bar in writing panel.
Now publish your Blog post and check it, you will able to see bullet list powered by Font Awesome. The main positive side of using Font Awesome that this will load from maxcdn server which is very fast to load. And there hasn't any change to deletion of the icons, because we are not using any image.
Google Advertisement
ads3


EmoticonEmoticon